You wire Claude Desktop to a Snowflake MCP endpoint, fire a few test queries, and everything looks fine. Then a product manager asks: “What drove the decline in net revenue retention last quarter for enterprise accounts?” The agent returns a table referencing revenue_current and revenue_prior with no filter on account tier, and the metric it chose looks like gross ARR. You run the same question manually against your warehouse, and the data is accurate, but the business meaning is wrong.
That’s the production failure most MCP tutorials skip. Getting data through an MCP connection takes about ten minutes. Getting correct answers to business questions requires the agent to understand what your metrics mean, how entities are defined across systems, and what your analysts know that never made it into a column name. This tutorial covers exactly that gap: the naive setup, why it breaks at scale, what enterprise MCP authentication requires, and how building a context layer upstream of the MCP server determines whether an agent produces output you can stake a decision on.
Why Raw Database MCP Connections Fail in Production
Most teams start with a direct connection: an mcpServers entry in claude_desktop_config.json that points Claude at a Snowflake MCP server, with account credentials and warehouse settings injected as environment variables.
{
  "mcpServers": {
    "snowflake": {
      "command": "uvx",
      "args": ["mcp-snowflake-details"],
      "env": {
        "SNOWFLAKE_ACCOUNT": "xy12345.us-east-1",
        "SNOWFLAKE_USER": "analytics_agent",
        "SNOWFLAKE_PASSWORD": "...",
        "SNOWFLAKE_DATABASE": "ANALYTICS",
        "SNOWFLAKE_WAREHOUSE": "COMPUTE_WH"
      }
    }
  }
}
Note: This configuration shows the minimum required to get a Snowflake MCP connection running. The official Snowflake Labs MCP server supports additional authentication methods (including Programmatic Access Tokens) and a service config YAML for enabling Cortex tools. This simplified JSON is for illustration purposes.
When Claude Desktop starts, its MCP client fires a tools/list call and receives tool definitions describing your warehouse: table names, column names, data types, and foreign key hints. What those definitions don’t carry is business meaning. The schema won’t tell the agent which of your six revenue columns maps to net ARR after refunds, or that your RevOps team manually restated Q3 churn figures after a CRM migration. So the agent joins fact_subscriptions to dim_accounts on whatever foreign key looks plausible — because plausible is all it has.
This creates three compounding failure modes for any business-critical query:
- Metric definition ambiguity: Your warehouse has
mrr_gross,mrr_net,arr_contracted,arr_recognized, andrevenue_gaap. Nothing in the raw schema tells the agent which one your CFO means by “net ARR.” The agent picks the most plausible-looking column and proceeds with confidence. - Missing cross-system join logic: Enterprise accounts exist in both Salesforce and Snowflake, but
Account.Idmaps tocustomer_dim.crm_account_idthrough a reconciliation rule that lives in a dbt model, not in the table schema. A direct join on company name produces a 12% mismatch rate because “Acme Corp” and “Acme Corporation” are not the same string. - Unstructured data inaccessibility: The analyst who documented a Q3 revenue exception wrote it in a Slack thread. It never made it into a column comment, so the agent has no way to find it.
What MCP Gives You (and What It Doesn’t)
The Model Context Protocol specification defines MCP as a client-server protocol that standardizes how LLM-based agents connect to external tools, data, and instructions. It exposes three server-side primitives:
- Tools: executable functions the agent can invoke with typed parameters, such as running a SQL query or triggering an API call.
- Resources: URI-addressable data objects the agent can read, such as a file or a database row, without executing logic.
- Prompts: predefined instruction templates the server exposes to shape agent behavior for specific tasks.
The protocol runs over JSON-RPC 2.0 and is transport-agnostic, supporting local stdio connections for development and HTTP with server-sent events for production. This means you don’t write custom integration code for each AI client, server-side tools stay reusable across Claude Desktop, Cursor, and custom applications, and agents stay composable across tool servers.
Where MCP’s scope ends is precisely where most enterprise deployments break. The protocol handles transport and tool invocation. It has no mechanism for encoding that “customer” in your org means an account with at least one completed purchase in the past 90 days, or that your RevOps churn rate excludes self-service downgrades that converted to a higher tier within 30 days. That knowledge lives in your analysts’ heads, in YAML definitions someone wrote months ago, and in Slack threads that no warehouse tool touches.
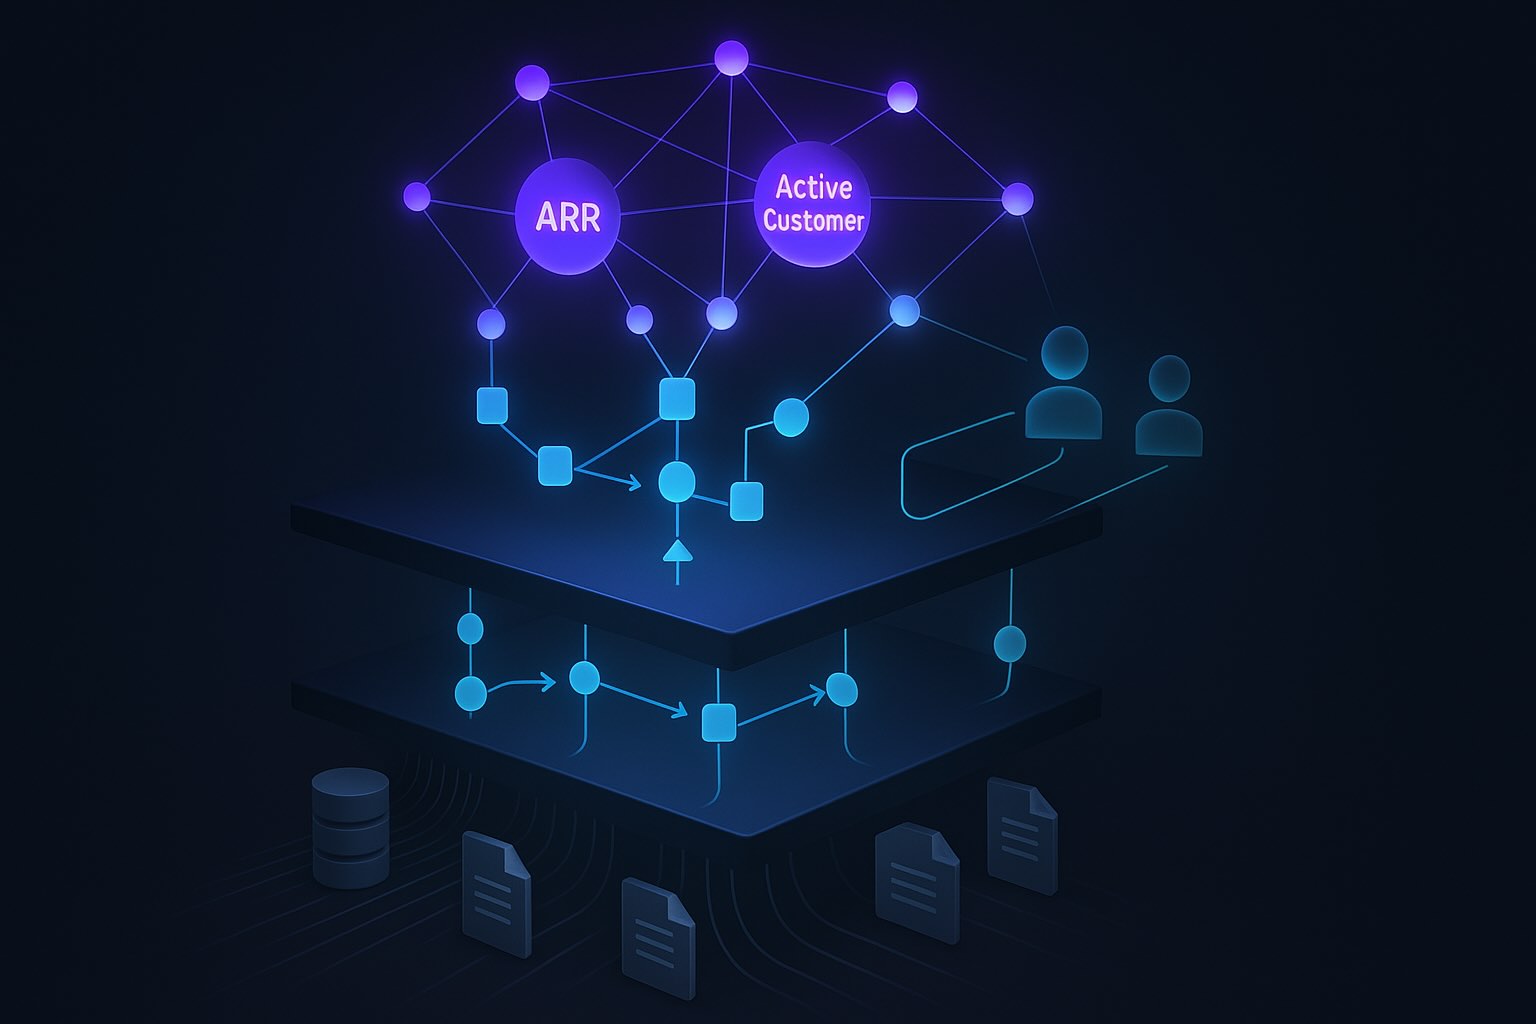
Every production enterprise deployment needs two distinct layers: a context layer that builds meaning from query logs, schemas, documents, and unstructured sources, and an MCP server that distributes that meaning to clients. Pointing an MCP-compatible client directly at a warehouse endpoint collapses both into one and eliminates the layer that requires actual work to get right.
Securing an Enterprise MCP Server: Authentication and RBAC
Per the MCP authorization specification, user-facing agent flows should use OAuth 2.1 with mandatory PKCE (Proof Key for Code Exchange). Service-to-service connections use scoped API keys. Before any tool invocation proceeds, the server runs four validation checks in sequence:
Token Validation Sequence
1. Verify JWT signature (RS256 or ES256 against the issuer's JWKS endpoint)
2. Check exp claim: reject if current timestamp exceeds token expiry
3. Validate iss claim against your allowlisted issuers
4. Confirm scope claim includes the required permission (e.g., read:revenue_metrics)
RBAC in an MCP context maps roles to specific tool namespaces rather than to database-level permissions. A read:revenue_metrics scope grants access to the revenue toolset exposed by the MCP server, with enforcement happening at the point of tool invocation. This means a compromised token with a narrow scope cannot pivot to adjacent data through an agent’s tool-calling loop.
That containment matters because agents inherit the full permission set of their connected data graph. An agent running with admin-level warehouse credentials that receives a prompt injection payload can read any table those credentials cover, including tables the end user was never authorized to see. Per the IBM AI Agent Security guide, privilege escalation through agent tool calls ranks among the highest-risk attack surfaces in enterprise AI deployments.
Jedify’s MCP Server addresses this at the platform level with fine-grained RBAC tied to Semantic Entity and toolset permissions, AES-256 encryption at rest, TLS 1.2+ in transit, and SOC 2 Type II and ISO certifications backed by continuous vulnerability scanning. The full compliance posture is documented at trust.jedify.com.
Building the Context Layer: Semantic Fusion™ Before You Wire the MCP
The sequence matters: build and validate the context layer first. The MCP server is the delivery mechanism for what you’ve already validated, and wiring clients before that validation is complete reproduces the exact failures described above.
Jedify’s Semantic Fusion™ process runs in four stages:
-
Connect: Integrate Snowflake, Databricks, Salesforce, and unstructured sources including Notion pages, Slack channels, internal documents, and PDFs. Jedify ingests schemas, query logs, and metadata from each source simultaneously.
-
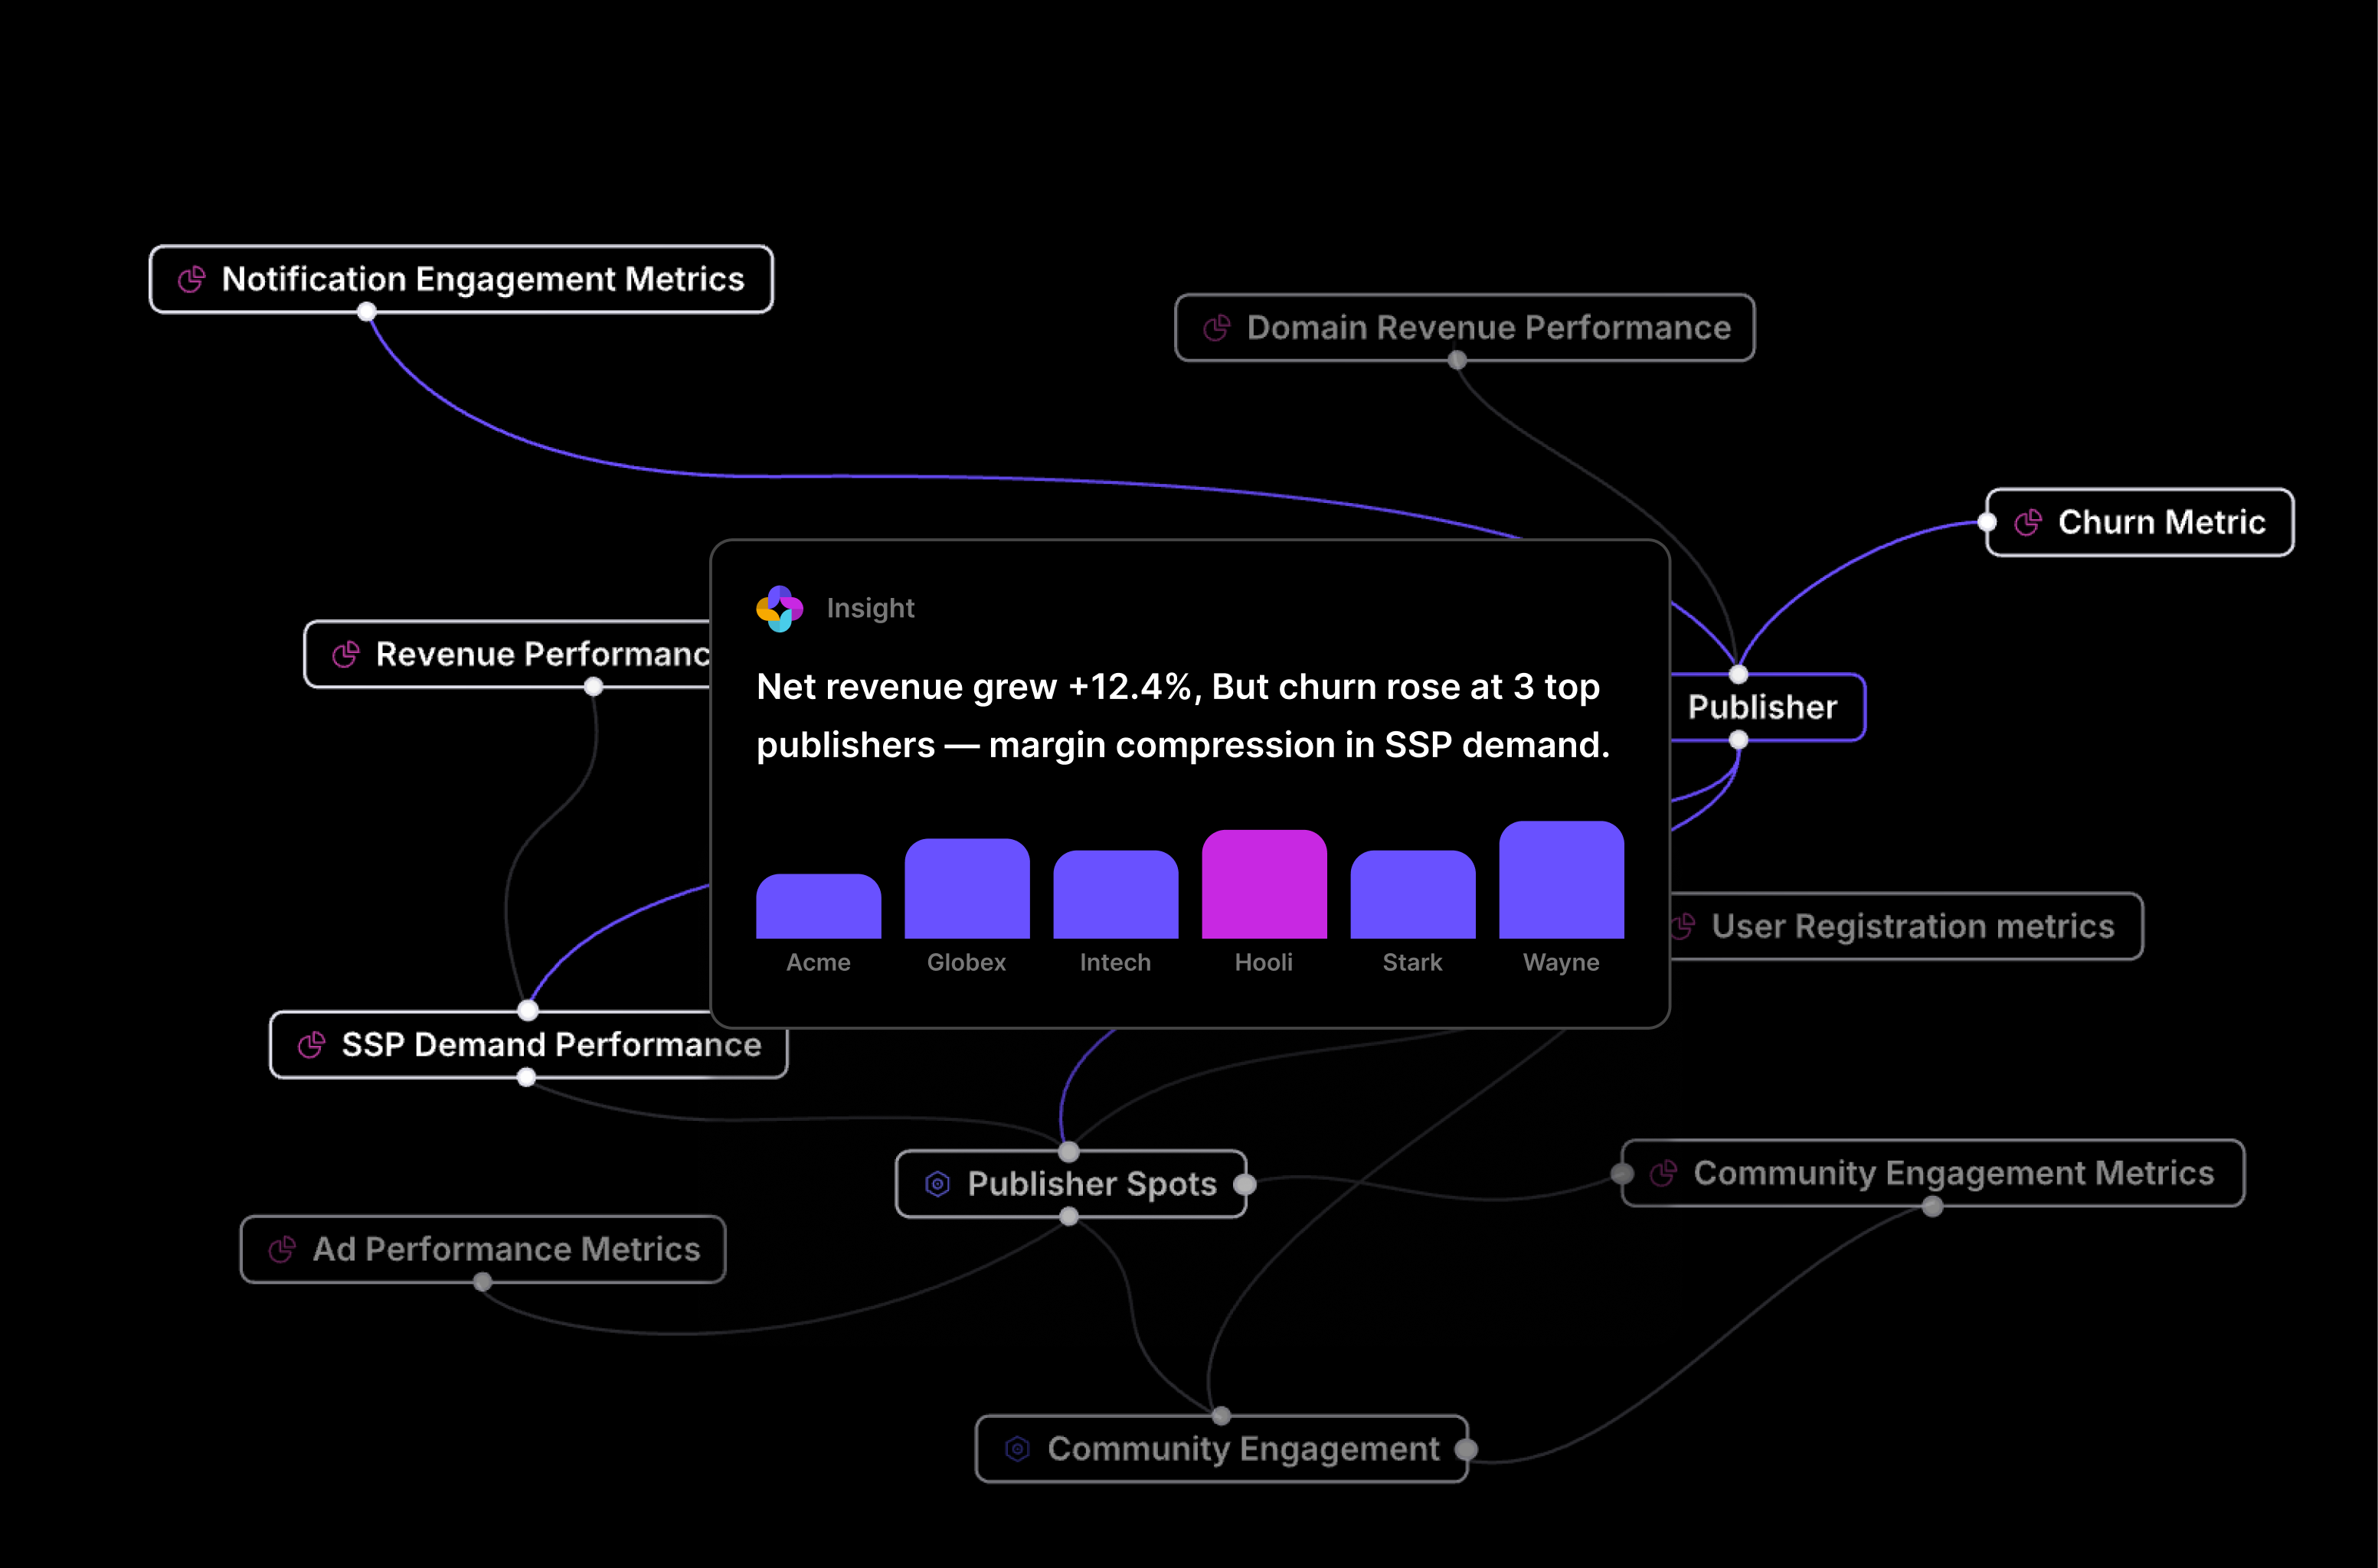
Generate: Autonomous processes mine query logs at scale. Across approximately 3 million queries, FP-Growth and Apriori clustering surface around 300 entity relations and 600 metrics without manual YAML configuration. Schema intelligence detects primary keys, entity relationships, and synonym patterns across tables. Named entity recognition (NER) extracts business terms from documents, BERTopic runs topic modeling across document corpora, and co-occurrence analysis resolves definition conflicts. The atomic outputs are Semantic Atoms, which the platform clusters using K-means and HDBSCAN into Semantic Entities.
-
Review and Refine: Your data team inspects the model, confirms entity definitions, configures RBAC, and reconciles source data. This is where you validate that your Semantic Entity for “enterprise account” matches your company’s actual definition (for example, ARR over $50K with a signed contract) and that the metric for “net revenue retention” references the correct formula across your warehouse tables.
-
Deploy: Expose the Context Graph via the Jedify MCP Server, the A2A Server, native agents, or the SDK.

Jedify’s streaming ingestion pipeline keeps the Context Graph current as your warehouse schema evolves, so you don’t need to re-run the Generate step every time a dbt model changes. The Context Graph also resolves cross-system entity identity, mapping Salesforce Account.Id to customer_dim.crm_account_id in Snowflake and maintaining a consistent Semantic Entity definition regardless of which source system the agent queries.
Wiring Claude Desktop, Cursor, and Custom Apps to the Jedify MCP Server
After the Review and Refine step, your Jedify workspace provides a server endpoint URL and API key. Add a single mcpServers entry to claude_desktop_config.json with the Jedify endpoint and bearer token:
{
  "mcpServers": {
    "jedify": {
      "type": "sse",
      "url": "https://mcp.jedify.com/v1/sse",
      "headers": {
        "Authorization": "Bearer your-jedify-api-key"
      }
    }
  }
}
Every Claude Desktop conversation now has access to Jedify’s full Semantic Fusion™ model through that connection. You don’t need to redefine your “enterprise account” entity in a system prompt for each conversation. The definition is encoded in the Context Graph and surfaced through the tool schema that Jedify’s MCP Server exposes to the client.
Cursor reads MCP configuration from .cursor/mcp.json at the project root, and the Jedify entry follows the same structure:
{
  "mcpServers": {
    "jedify": {
      "type": "sse",
      "url": "https://mcp.jedify.com/v1/sse",
      "headers": {
        "Authorization": "Bearer your-jedify-api-key"
      }
    }
  }
}
Enterprise teams can centralize this through Cursor’s team admin settings so every developer connects to the same Jedify endpoint with a consistent API key scope. Per Cursor’s enterprise MCP documentation, team-level MCP configurations propagate across all connected development environments without per-developer setup.
For custom applications outside Claude and Cursor, the Jedify SDK provides programmatic access to the same Context Graph. A RevOps automation pipeline, a Slack analytics bot, or a custom internal agent can query context-aware answers directly. The context_scope parameter maps to the RBAC role configured in your Jedify workspace:
from jedify import JedifyClient

client = JedifyClient(api_key="your-jedify-api-key")

result = client.query(
    question="What drove the decline in net revenue retention last quarter for enterprise accounts?",
    context_scope="revenue_metrics"
)

print(result.answer)
print(result.lineage)  # Source tables, metric definitions, and entity definitions used
A single MCP connection to Jedify replaces the layered system prompts previously loaded with metric definitions, join instructions, and data quality caveats.
The Context Delta: Same Prompt, Two Connections
Running “What drove the decline in net revenue retention last quarter for enterprise accounts?” through a raw Snowflake MCP connection and through the Jedify MCP Server produces categorically different outputs. The table below compares what each connection provides across five dimensions.
| Dimension | Raw Snowflake MCP | Jedify MCP Server |
|---|---|---|
| Metric definition | Selects revenue_current / revenue_prior from the closest-matching fact table |
Applies the Semantic Fusion™-defined NRR formula: (starting ARR + expansion – contraction – churn) / starting ARR, scoped to contracted accounts only |
| “Enterprise accounts” filter | Applies no tier filter, or falls back to a generic account_tier column if one exists |
Applies the Semantic Entity definition: accounts with ARR over $50K with a signed contract, consistent with the CRM definition |
| Cross-system joins | Attempts a direct table join with no knowledge of CRM-to-warehouse entity mapping | Resolves Salesforce Account.Id to customer_dim.crm_account_id using the reconciliation rule encoded in the Context Graph |
| Unstructured context | No access | Surfaces the analyst note from a Slack thread: Q3 churn figure was restated post-CRM migration, with effective date and scope documented |
| Data lineage | None returned | Lists all source tables, metric definitions, entity definitions, and unstructured sources referenced in the answer |
The table maps directly to the three failure modes from Section 1. Metric definition ambiguity produces a number that is technically derived from your schema but wrong for your business question. Missing cross-system join logic means “enterprise accounts” either goes unfiltered or gets approximated. The absence of unstructured context means the agent produces an answer that contradicts information your own analysts documented, because it has no path to that documentation.
Jedify publishes side-by-side demo videos showing identical prompts run against raw Snowflake MCP and the Jedify MCP Server. The output difference is visible and reproducible on any schema that has the three failure conditions described above.
Your Next Step: Run This on Your Own Data in Under an Hour
The most direct way to evaluate the output difference is to run the same business question through both connections against your actual data.
Sign up at jedify.com and connect your first data source (Snowflake or Databricks) through the self-serve onboarding flow. Semantic Fusion™ runs the Generate step over your query logs and schema automatically. In the Review and Refine step, confirm at least one business entity definition: your company’s definition of “enterprise account” or “active customer” is a good starting point. Then grab your Jedify MCP Server endpoint and API key from your workspace, add the configuration to claude_desktop_config.json or Cursor’s MCP settings using the format from Section 5, and run the same query you previously ran against your raw warehouse connection.
Think of it as a trust calibration test: which output would you stake a business decision on? If the Jedify output references your actual metric definition, applies your entity filters, and surfaces the unstructured context your analysts rely on, the difference is concrete and measurable.